Deploying a Heroku App through Git
STEP 1:
Open the .zip file downloaded from the GbCC convertor on your computer and save the folder on your machine.
STEP 2
Open up the command line (terminal):
Before continuing, make sure that you have both the Git CLI and Heroku CLI downloaded.
https://git-scm.com/book/en/v2/Getting-Started-Installing-Git
https://devcenter.heroku.com/articles/heroku-cli#download-and-install
STEP 3
Change directories into your application
$ cd <path_to_application>
In order to find where your application is, you can copy the path from your documents folder.
$ ls
Once you’re inside the application, list the contents to ensure you’re in the right location

STEP 4
Login to your Heroku account
$ heroku login

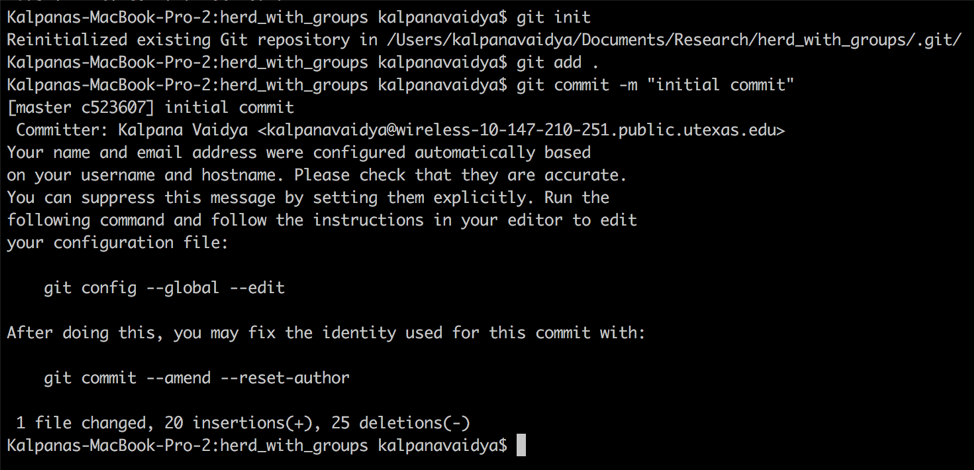
STEP 5
Initialize and push your application to Git
$ git init
This creates a local repository for you to add files to
$ git add .
This adds all of the folder’s contents to your repository
$ git commit -m “initial commit”
This saves your files in their current state to the repository
The message inside the “” can be whatever you want
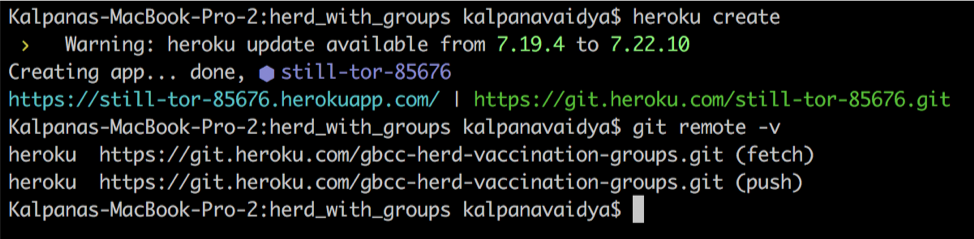
STEP 6
Create your Heroku application
$ heroku create
This will create an app folder on Heroku and point your git repository to it
If you already have a Heroku app, use the following command:
$ heroku git:remote -a <app_name>
$ git remote -v
This will ensure that a Heroku remote has been set for your app
STEP 7
Deploying your code
$ git push heroku master
This will push all your code to your Heroku remote repository
Use the add, commit, and push steps in order to deploy changes for your app
STEP 8
Running your app
$ heroku open
This will open up your application in a web browser